The 1-3-1 zone: four lines, one baseline runner
Basketball · Defence · 5 of your players
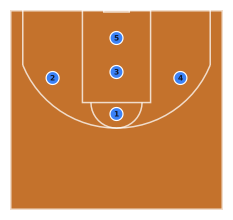
The middle defender is the whole reason to play this one. He stands in the lane between the free-throw line and the rim, so the pass that beats a 2-3 has a body in it before it leaves the hand.
Opens on a basketball pitch with the shape already drawn. Free, no signup.
The four lines of it
One defender at the point inside the arc. Three across the middle: a wing out on each side and, between them, a defender in the lane below the free-throw line. One more on the baseline in front of the rim. Four rows, five players, and every one of them a hand in a passing lane the offence expected to be empty.
Read it top to bottom and the trade is obvious. Four defenders cover the width of the floor above the blocks, which is a great deal of interference for a team that wants to swing the ball. One defender covers the entire baseline. Deflections come cheap. So do layups, if the baseline man is slow to run or the middle man never digs down to the block.
Where it earns its money
The corners are the point of it. A pass into either corner is answered by the wing on that side and the baseline defender arriving together, and the offence has caught the ball in the one place on the floor with two boundaries already helping you. Teams that had not planned for it throw the pass back out over the top, which is exactly the interception your point defender is standing there for.
Pick it when you have a long, active middle defender and a baseline defender who will genuinely run corner to corner. Pick something else against two bigs who both want a block, or against a passing team happy to skip the ball across the floor and make your one baseline man cover fifty feet.
Habits that make or break it
- The trap arrives as a pair or not at all. Draw both defenders into the corner and animate it. One early, one late, and the offence has a two-on-one going to the rim.
- The middle man digs, then recovers. Give him a path down to the block and back up to the free-throw line, and watch whether the recovery beats the ball out of the post.
- Rotate on the skip. Mark where all five stand after a corner-to-corner pass. That second picture is the one teams score against, and almost nobody draws it.
Drop the 1-3-1 onto the court, put your own offence around it, and animate the skip pass to find out whether your rotation really gets there.
Also known as
- zone defence
- 1-3-1
- trapping
- half court
Shapes to look at next
1-2-2 zone
Defence · 5 players
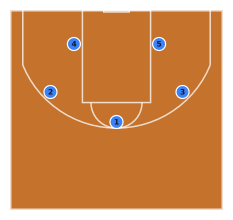
One up top, two on the wings and two low. Pressures the ball higher than a 2-3 and invites the pass into the middle, where the two low defenders are waiting.
Read the setup
2-3 zone
Defence · 5 players
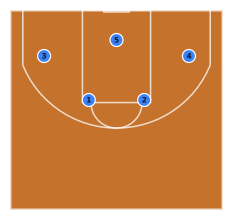
Two guards at the free-throw line extended over three across the baseline. Protects the paint and the boards, and asks the offence to beat it from outside.
Read the setup
4-out 1-in
Attack · 5 players
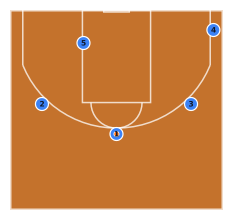
Four players spaced around the arc with one post on the left block. Keeps a genuine inside threat while leaving three-quarters of the floor open for perimeter action.
Read the setup
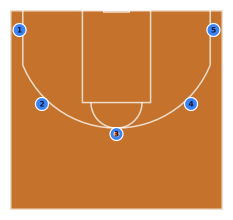
5-out
Attack · 5 players
All five outside the three-point line — both corners, both wings and the top of the key — so the lane is completely empty to drive or cut into. The spacing motion offence most youth programmes start with.
Read the setup
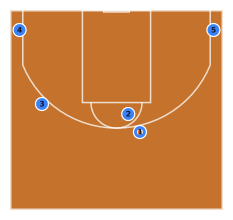
High pick and roll
Attack · 5 players
Ball handler above the arc on the right with the screener stepping up to meet him, both corners filled and the weak-side wing lifted. The three spacers keep help defenders a pass away from the roll.
Read the setup
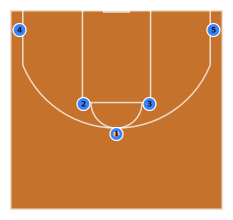
Horns
Attack · 5 players
Two bigs at the elbows, two shooters in the corners, the ball at the top of the key. Every horns action — the double drag, the flare, the elbow entry — starts from exactly this picture.
Read the setup
Put the 1-3-1 zone on a pitch
It opens with the shape already drawn. Move the players your team does differently, drag the runs, and send your squad a link that animates.
Open in PlaymakerPage updated · Basketball play designer · All templates