Crowd one side, use the other
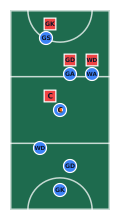
Netball · Attack · 7 of your players and 4 opponents
Wing attack and goal attack stand side by side on the right of the transverse line, with the goal shooter drifted left. Two defenders in one channel get in each other’s way, and the empty left side is there for a re-cut.
Opens on a netball pitch with the shape already drawn. Free, no signup.
The set-up
In the Centre pass overload right, goal attack (2) and wing attack (3) start 3.4 m apart on the right half of the attacking transverse line, about 10 m from the goal line. Their goal defence and wing defence follow them over, each drawn about 2 m goal-side — further than real marking, so the markers stay readable. Our goal shooter (1) has drifted left, 5.5 m from the left side line and 4.3 m out from the post.
The centre (4) is in the centre circle with the ball; their centre sits to her left in the centre third. Wing defence (5) waits on the left of the defending transverse line, goal defence (6) and goal keeper (7) deeper behind her.
What it is trying to do
Two attackers in one channel force two defenders into the same few metres. Whichever lead goes first, the second one can use the first as a screen, and a defender who has to run around a teammate is a step late. If the defence slides right with both of them, the whole left side of the centre third is empty, and the goal attack can re-cut back into it.
The goal shooter's position matters too. Drifted left, she pulls the goal keeper with her, which keeps the space in front of the circle on the right side clear for the second phase.
What to drill
- First lead, second lead. Decide which of the pair goes first and animate it. Then swap them and compare.
- The re-cut. Draw the goal attack faking right and cutting back left into the empty side. It only works if she waits for the defence to commit.
- Mirror it. Save a copy and mirror the set-up to the left, so the team can run it from either side.
Open it in the designer and draw the movement that suits your attackers.
Also known as
- centre pass
- overload
- stack
- screen
- attacking structure
Shapes to look at next
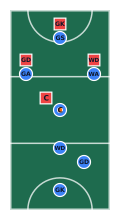
Centre pass split lead
Attack · 11 players
Goal attack and wing attack start at opposite ends of the transverse line, so their defenders cannot help each other, and the wing defence sits in the middle of the defensive line as the safe back option. The centre has two first-pass targets as far apart as the court allows.
Read the setup
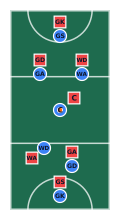
Centre pass set-up
Formation · 14 players
All fourteen players where the rules put them at the whistle: our centre in the circle with the ball, the opposing centre free in the centre third, and everyone else waiting in a goal third with a defender goal-side of them. The picture every other centre-pass play starts from.
Read the setup
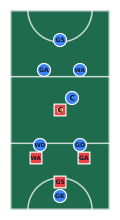
Centre pass defence: front the leads
Defence · 11 players
Their centre pass. Our wing defence and goal defence stand on the ball side of the players they mark, right on the transverse line, so the straight lead to the circle edge is taken away and the first pass has to go long, wide or backwards. The goal keeper stays goal-side of the shooter.
Read the setup
Attacking backline throw-in
Set piece · 11 players
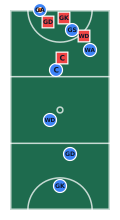
The ball has gone out over the goal line we attack. Goal attack takes it beside the post, the goal shooter holds on the far side of the ring, wing attack waits on the edge of the circle and the centre comes high as the safe pass. Their goal defence has to stand 0.9 m off the thrower.
Read the setup
Defensive backline throw-in
Set piece · 11 players
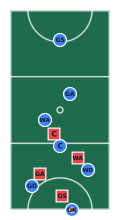
A missed shot has gone out over the goal line we defend. The goal keeper throws in, the goal defence breaks for the side line, the wing defence offers on the edge of the circle and the centre holds the transverse line, so the ball can be worked out of the defensive third in two passes.
Read the setup
Sideline throw-in, attacking third
Set piece · 11 players
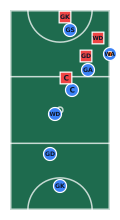
Wing attack throws in from the right side line in the attacking third. Goal attack leads hard towards the thrower, the goal shooter holds in the circle for the second ball, and the centre stays back on the transverse line so there is always a pass that cannot be intercepted.
Read the setup
Put the Centre pass overload right on a pitch
It opens with the shape already drawn. Move the players your team does differently, drag the runs, and send your squad a link that animates.
Open in PlaymakerPage updated · Netball play designer · All templates