The 1-3-3-1, counted across the pitch
Rugby · Attack · 15 of your players
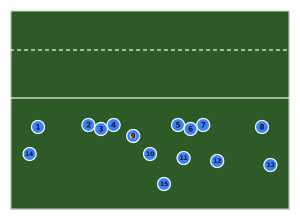
The digits are a width map, not lines of depth. Eight forwards spread from touchline to touchline, the halves and centres in behind, and a pod waiting on either side of every breakdown.
Opens on a rugby pitch with the shape already drawn. Free, no signup.
The width map, not a depth chart
Read the numbers across the field rather than back from the ball: one forward in the left 15 m channel, a pod of three, a second pod of three, one forward in the right channel. In this drawing the two channel forwards stand about 7 m in from each touchline, Pod A occupies roughly 20 m to 26 m across and Pod B roughly 42 m to 48 m, and all eight are on more or less the same line about 29 m out from the try line. The scrum-half sits a couple of metres behind that line between the pods, the fly-half about 6 m deeper again in the middle of the pitch, the two centres stepping out to the right, the left wing hard against the far touchline and the fullback deepest of all.
The reason the shape survives contact is arithmetic. Wherever the next ruck forms, there is already a pod on both sides of it. Nobody has to run 30 m across the field to be the first forward to the next carry, which is the tax a two-pod shape keeps charging the moment the ball comes back the other way.
When a 1-3-3-1 earns its keep
Use it for multi-phase attack in the middle third, when you want to go left, right, left without stopping to reorganise. It suits a side whose forwards can carry in threes — one ball carrier, two cleaners — and whose halves are happy to play what is in front of them rather than run a called move.
It is a poor fit for the first two phases off a set piece, where you want numbers concentrated, and it punishes a pack that drifts. Two pods that creep towards the ball turn 1-3-3-1 into 1-6-1, and the far channel forward is then 40 m from help.
The two habits to drill
- Pods hold their channel. Drag Pod B five metres towards the ruck and show the players the gap that opens on the far side. That picture wins the argument faster than shouting "stay wide" for twenty minutes.
- The channel forward is a real option. Draw a pass from the fly-half past both centres to the right channel forward, then animate it, so the wide forward stops being scenery.
- Reload, not recover. Mark where each pod has to be for phase two and drag them there, so the run to the next ruck is a distance rather than an instruction.
Load this template in the designer, put your own carriers in the pods, and draw the two phases you actually want to see on Saturday.
Also known as
- pods
- phase play
- 1-3-3-1
- forward distribution
- width
Shapes to look at next
Attacking backline from a scrum
Rugby · Attack · 15 players
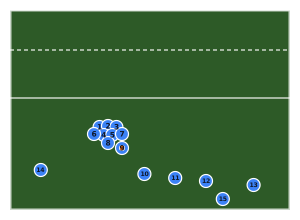
A full fifteen: eight bound into the scrum, the scrum-half at the base, and the backline fanned out to the open side roughly 8 m apart with the fly-half 10 m off the gain line. The blindside winger and fullback cover behind.
Read the setup
Defensive line (13 up, 2 back)
Rugby · Defence · 15 players
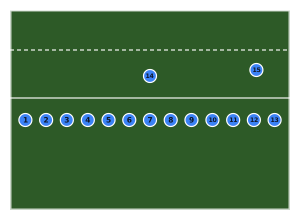
Thirteen in the front line at roughly 5 m spacing right across the pitch, with the fullback sweeping behind and the blindside winger holding the back field. The default defensive picture from a phase in the middle of the park.
Read the setup
Ruck defence: pillar and post
Rugby · Defence · 17 players
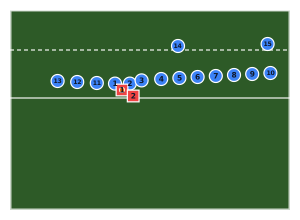
Defending a ruck: two pillars either side of it, the post defender next out, then seven spread across the open side and three covering the blind, with the fullback and a winger sweeping. Gets the two jobs nobody volunteers for filled first.
Read the setup
Kick-off receive
Rugby · Set piece · 15 players
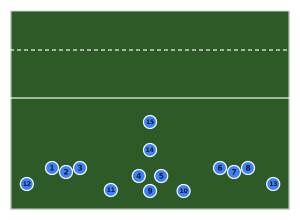
Receiving the restart: the forwards in two pods of three with a pair in the middle, all standing at least 10 m back from halfway where the ball has to land, the halves behind them and the outside centre and fullback covering the deep kick.
Read the setup
Lineout (7-man)
Rugby · Set piece · 15 players
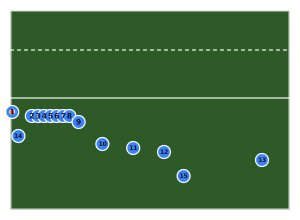
Seven forwards formed between the 5 m and 15 m lines with the hooker throwing from the touchline, the scrum-half receiving just outside the 15 m line and the backs stacked behind. Where the whole line stands is the bit coaches get wrong on a whiteboard, so it is drawn to the marks.
Read the setup
4-out 1-in
Basketball · Attack · 5 players
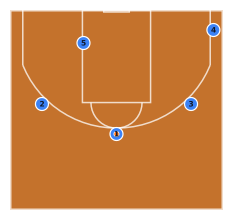
Four players spaced around the arc with one post on the left block. Keeps a genuine inside threat while leaving three-quarters of the floor open for perimeter action.
Read the setup
Put the Attacking pods (1-3-3-1) on a pitch
It opens with the shape already drawn. Move the players your team does differently, drag the runs, and send your squad a link that animates.
Open in PlaymakerPage updated · Rugby play designer · All templates